|

Display and enter hours remaining estimates directly on the timesheet main grid
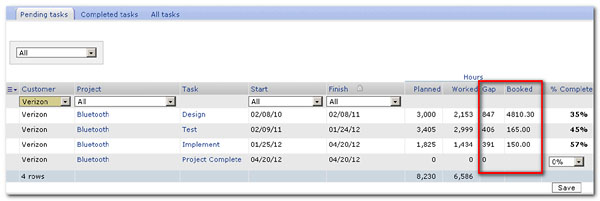
The OpenAir hours remaining functionality allows project managers to track the number of hours a user believes may be remaining to complete a task. For companies that leverage this functionality, users will enter their estimates when entering time on a timesheet. With the hours remaining functionality enabled, the system will use these estimates to calculate the percent complete of the project. In addition to allowing users to enter their own hours remaining estimates, users can also see what the system estimates to be remaining based on the planned hours designated on the project plan. With this option enabled, when users enter time on their timesheet, a read-only view of the number of hours remaining based on the project plan is displayed. Users can then compare their own estimates with the system estimates.
With this release, we have made it easier for users to enter their hours remaining estimate. The "Hours remaining" field can now be displayed as a distinct column on the timesheet main grid. Users will be able to enter estimates right next to each task selection. In addition, if the system estimate as been enabled, it can also be displayed as a distinct column on the timesheet grid. Previously, within their timesheet, users would navigate away from the timesheet grid, to the "Hours remaining" link. Note: This feature is available for both the classic and dynamic grids.
To enable hours remaining for tasks, administrators navigate to Administration > Application Settings > Timesheets Settings. Check the option "Enable the "Hours remaining" on tasks estimating feature" and Save.
To enable the system generated estimate, administrators navigate to Administration > Application Settings > Timesheets Settings. Check the option "Use the system estimate if "hours remaining" are not entered" and Save.
To enable the ability to enter hours remaining directly on the timesheet grid, please contact OpenAir Support. Please note that once enabled, the existing "Hours remaining" link will be removed.
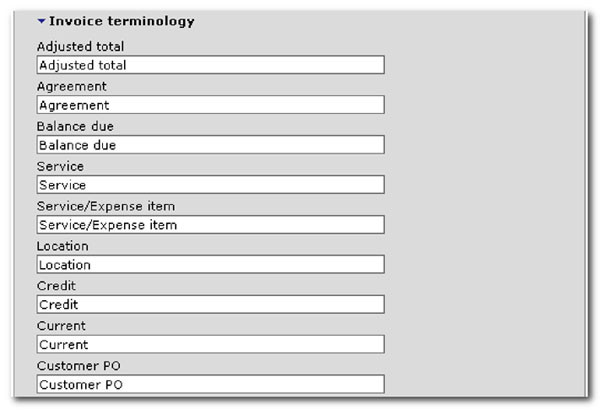
To change the terminology of "Hours remaining" and "System estimate (hrs), navigate to Administration > Display > Interface: Terminology.
How to enter hours remaining:
- Once the feature has been enabled, navigate to an open timesheet.
- Under the "Hours remaining" column, enter the appropriate number of hours next to each task. Note: If the same task has been selected more than once, the hours remaining value will always display as the same for all tasks.
- If the system generated estimate has been enabled, the system generated estimate will be displayed as a grayed out box right next to the hours remaining field.
"Own proxy" email notifications for submissions. Configure timesheet submission email template
In the September 2010 release, OpenAir added the ability for users that have been designated as an "Own proxy" for a timesheet approver, to receive the timesheet submission email notification in addition to the standard approver. This allowed users who may act on another user's behalf to be notified if a timesheet is waiting for approval. OpenAir has enhanced this functionality to not only allow "Own proxy" users to receive the email notification, but to also allow users to configure the email that is sent. Among the configuration options are the ability to include additional recipients that should be CC'd on the email, as well as the ability to customize the content of the email.
To enable this additional functionality, please contact OpenAir Support.
To suppress the standard timesheet emails, please contact OpenAir Support.
How to configure "Own proxy" emails and configure timesheet submission email:
- Users with the appropriate role privileges, navigate to Administration > Application Settings > Timesheets Settings.
- Under the "New" dropdown, select "Approval Requested notification".
- In the "Conditions" section, select "Yes" under the "Approver has "own proxy" defined" dropdown. If necessary, select a specific client:project that the notification should be applied to.
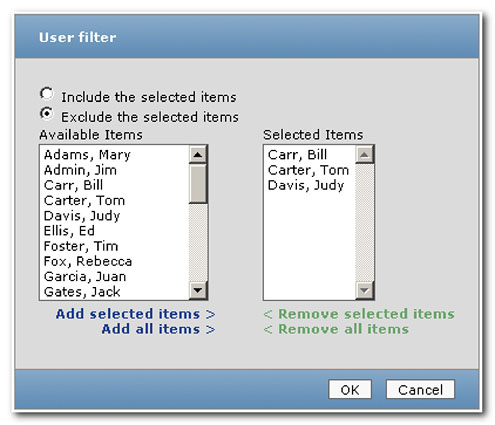
- If applicable, in the "Notify" section, specify who should receive this notification. Individual email addresses can be entered or existing users within the OpenAir instance can be selected. In the "Selected users" box, select [Approver] and [Approver's own proxy].
- If selecting more than one recipient, users can choose to have a separate email sent to the users (all containing the same content) or have all recipients appear in the To: line. To Select the appropriate option under the "For email with multiple recipients:" dropdown
- Under the "Message" section, customize the email notification. Type the "Email subject." It displays on the subject line. For the "Email body", use the "Field" drop-down list to identify OpenAir variables and custom fields. Click on the [paste] link to copy the OpenAir variables into the body. OpenAir fills in the account information in the body of the email.
- Click Save.
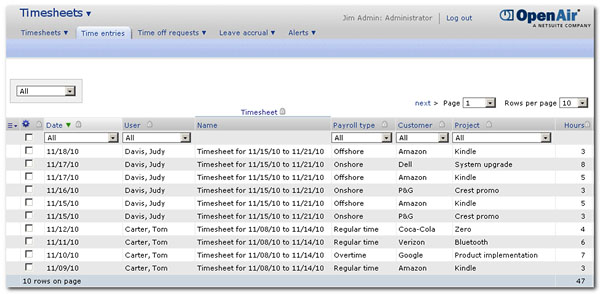
Display Payroll type field on Time entries list view
In the November 2008 release, the ability to view individual time entries as a separate tab in the Timesheets module was added. The list of time entries may be used to identify the time logged by contractors and to mark these time entries as paid with an associated invoice. When viewing these entries, it may be beneficial to see the associated payroll types. In this release, we have added the ability for users to customize the Time entries list view to display the "Payroll type" field.
To enable the Time entries tab, please contact OpenAir Support.
To display the "Payroll type" in the Time entries list view, users with the appropriate role privileges navigate to a list and click on the "Customize list view" link. Add "Payroll type". Click OK.
|